Mail Designer Guide
Learn how to customize and automate email alerts sent to your customers. With our interactive Mail Designer, you can personalize notifications for saved items, price drops, and stock updates to match your store's exact branding.
1. Email Campaign Selection Tabs
At the very top of the designer screen, select the specific automated email trigger you want to customize:
- Wishlist Reminder: Sent to gently remind customers about items left sitting in their wishlist.
- Wishlist Alert (Immediate): An instant confirmation email triggered right after a customer saves a product.
- Price Drop Alert: Automatically sent when an item on a customer’s wishlist goes on sale.
- Back in Stock: Notifies customers instantly when a wishlisted item is restocked.
- Low Stock: Alerts shoppers when items in their wishlist are running low on inventory to create urgency.
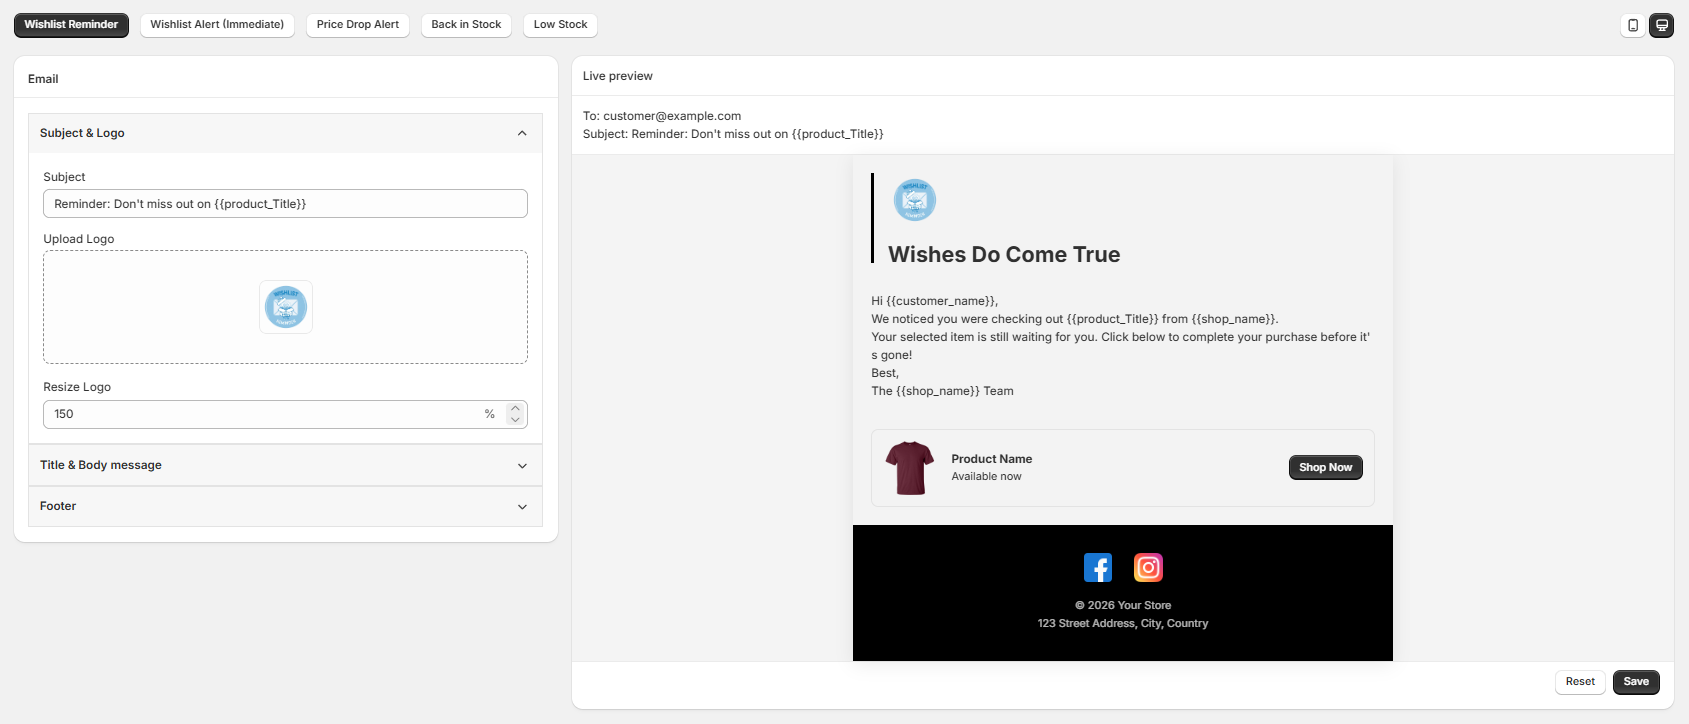
2. Design & Content Customization (Left Panel)
The left sidebar features accordion blocks that group your design controls logically:
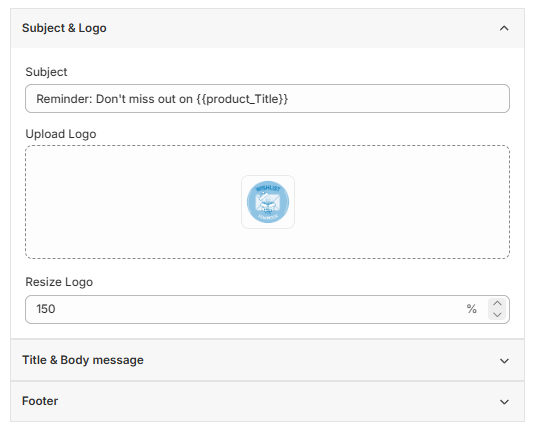
A. Subject & Logo Accordion
- Subject Line: Craft an engaging email subject line. You can use dynamic merge tags like {{product_Title}} to make it personalized (e.g., "Reminder: Don't miss out on {{product_Title}}").
- Upload Logo: Drop or upload your official store logo to make your emails instantly recognizable.
- Resize Logo: Fine-tune your logo size using a percentage slider scale.
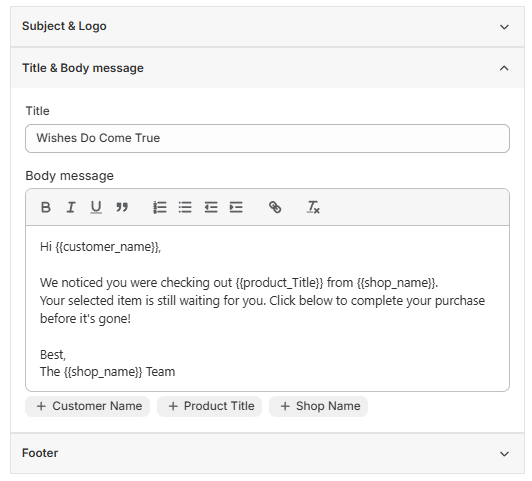
B. Title & Body Message Accordion
This section lets you manage the core text content, headings, and dynamic customer merge tags.
- Title: Enter the main heading message that appears at the top of your email template (e.g., "Wishes Do Come True").
- Rich Text Editor: The body message area features built-in text formatting tools:
- Text Styling: Easily apply Bold (B), Italic (I), Underline (U), Blockquotes, Text Alignment, Links, and Clear Formatting features.
- Personalization Tags (Merge Tags): Insert dynamic placeholders directly into your message using the quick-add buttons below the editor:
- + Customer Name: Inserts the {{customer_name}} tag to greet shoppers personally.
- + Product Title: Inserts the {{product_Title}} tag to dynamically fetch the specific saved item name.
- + Shop Name: Inserts the {{shop_name}} tag to keep your store name dynamic across all automated templates.
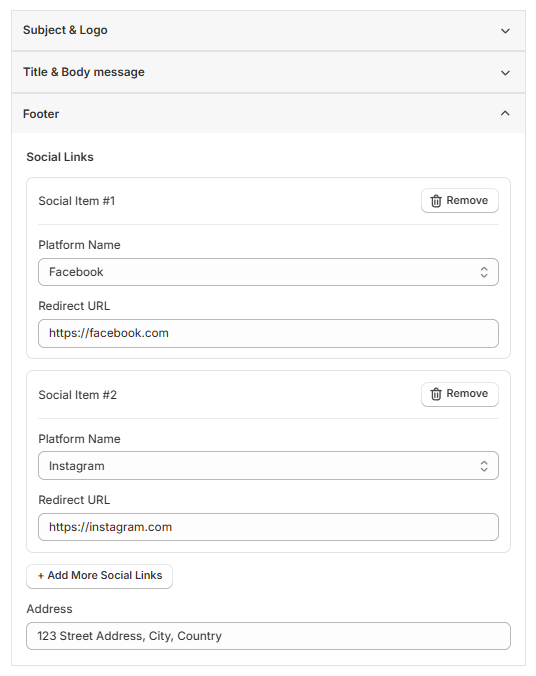
C. Footer Accordion
This section controls the lowest point of your email template, handling your brand's social identity and legal location details.
- Social Links: Manage and customize your external profile triggers block-by-block:
- Platform Name: Choose the target network from the dropdown field.
- Redirect URL: Input your absolute page link (e.g., [https://facebook.com](https://facebook.com), [https://instagram.com](https://instagram.com), [https://x.com](https://x.com)).
- Remove Button: Click "Remove" on any social item row to instantly delete that specific link and icon block from your template footer.
- Add More Social Links Button: Click the + Add More Social Links button to generate a brand new social platform block.
- Address Field: Enter your formal business location details to comply with global email policies.
3. Live Preview & Device Layouts (Right Panel)
The right side provides an instant rendering of your final email layout before deployment:
- Dynamic Personalization Preview: View how dynamic data layout elements (like the product box featuring the main image and a Shop Now button) will line up seamlessly.
- Device Preview Toggles: Look at the top right corner of the live preview panel to switch between Desktop View and Mobile View icons. This ensures your emails look flawlessly responsive on all devices.
4. Saving Your Work
- Reset Button: Reverts all modifications back to the default layout template state.
- Save Button: Finalizes and publishes your custom email design templates to your active marketing workflow automation.