App Settings
Sender Configuration Guide
Manage your active email marketing delivery channels, review automated synchronization metadata profiles, and run diagnostic validation tests to ensure clean deliverability.
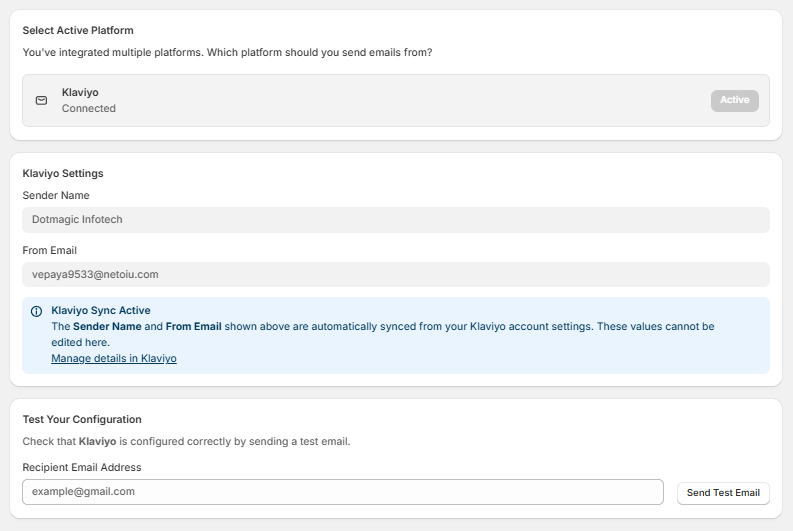
1. Select Active Platform
Choose which integrated service handles the transmission layout when distributing automated system notification campaigns.
- Routing Allocation: Review your available integrations to determine which platform should send emails from your store.
- Connected Channel Item: Displays your connected third-party tools (e.g., Klaviyo - Connected).
- Active Status: Features a gray Active label container indicating this specific system is currently selected to handle background mail distribution tasks.
2. Integrated Platform Settings Block
This module displays your specific sender configuration parameters pulled directly from your active marketing integration (e.g., Klaviyo Settings view):
- Sender Name: Shows the official organizational name handle that your customer base sees in their email inboxes (e.g., Dotmagic Infotech).
- From Email: Displays the destination email address associated with your outgoing messaging layouts (e.g., vepaya9533@netoiu.com).
- Automated Sync Banner: A blue information block outlines field boundaries and credential rules:
- Klaviyo Sync Active: The Sender Name and From Email shown above are automatically synced from your Klaviyo account settings. These values cannot be edited here.
- External Redirection Link: Click the blue text link labeled "Manage details in Klaviyo" to jump over to your external dashboard settings and modify your core delivery profile details.
3. Test Your Configuration
Run diagnostic verification sweeps to ensure your third-party integrations, credentials, and template delivery systems are fully functional.
- Recipient Email Address: Type your personal target test account into the field box (featuring sample placeholder text example@gmail.com).
- Send Test Email Button: Click the "Send Test Email" action button to trigger an immediate, live layout test to your inbox. Use this to verify inbox placement, check styling elements, and confirm delivery before launching automated customer flows.