Discount Rules Guide
Create target-oriented, automated promotional offers triggered directly by your customer wishlists. This guide outlines how to manage, construct, and assign specific discount flows to optimize store conversions.
1. Discount Rules Directory
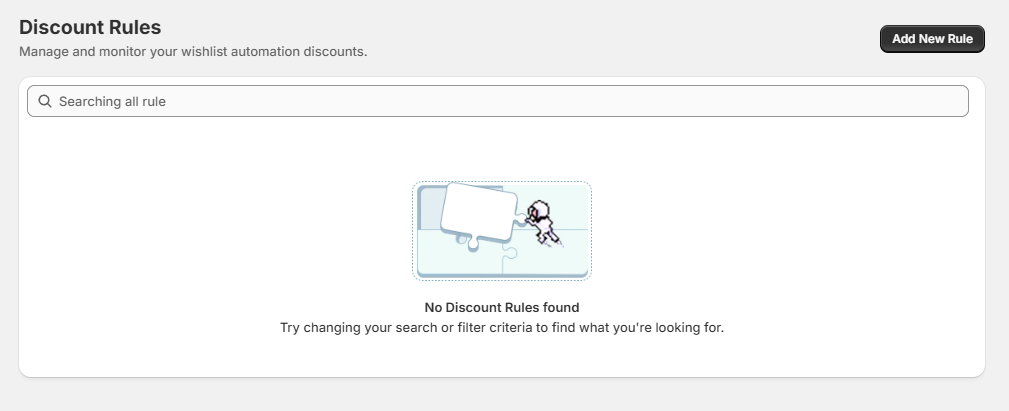
When accessing the main directory, you can easily view, search, and monitor all your current promotions in one centralized table view.
- Search Bar: Quickly locate specific active configurations using the "Searching all rule" input field.
- Empty State Handling: If no automations are configured yet, an illustrative prompt will suggest altering your filter terms.
- Creating a Promotion: Click the "Add New Rule" action button in the upper-right corner to open the creation workspace.
2. Rule Configuration Workspace (Add New Rule)
The modification panel breaks your setting options down into explicit functional categories:
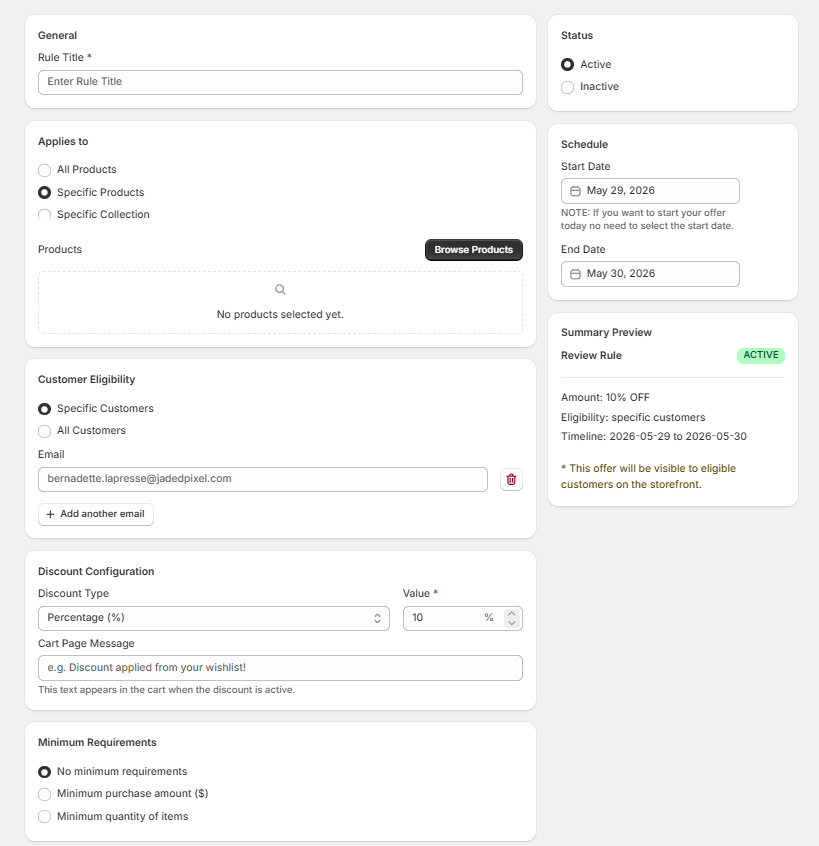
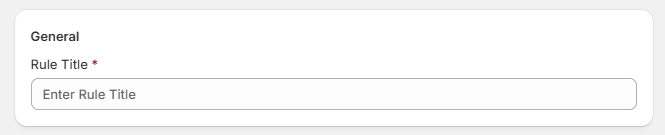
A. General Information
- Rule Title: Assign a unique internal identifier for this automated promotion to track its analytical performance.
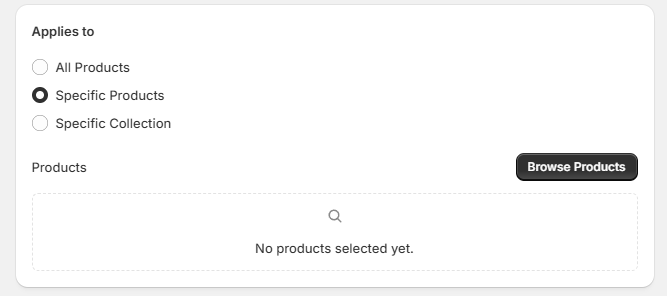
B. Applies to (Product Targeting)
Define the explicit scope of items eligible for the automated markdown:
- All Products: Applies the rule configuration store-wide across all active items.
- Specific Products: Restricts the offer to explicit line items. Click "Browse Products" to launch the product selector overlay.
- Specific Collection: Targets your offer toward specific categories or collections.
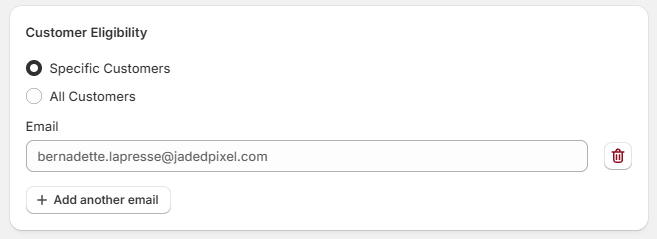
C. Customer Eligibility
Determine exactly which shoppers can trigger this promotional logic:
- Specific Customers: Manually white-list distinct shopper emails. Click "Add another email" to append new entries, or click the trash icon next to an input field to remove a specific email address.
- All Customers: Open eligibility to any visitor who qualifies based on their active items list.
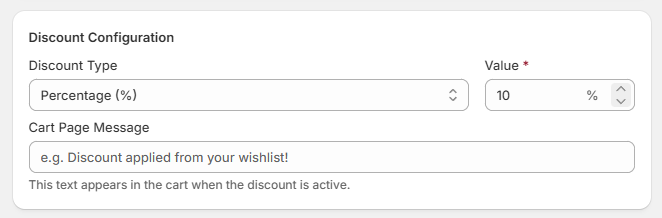
D. Discount Configuration
- Discount Type: Select your preferred calculation model from the dropdown field (e.g., Percentage (%)).
- Value: Input the flat value or modifier limit for the rule (e.g., 10 %).
- Cart Page Message: Customize the alert text that displays to shoppers during checkout when the qualification rules are met (e.g., "Discount applied from your wishlist!").
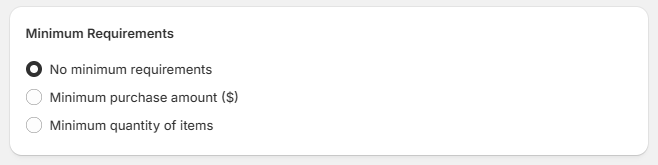
E. Minimum Requirements
Add spending thresholds or minimum structural dependencies to protect profit margins:
- No minimum requirements: The promotion is immediately active if targeting items match.
- Minimum purchase amount ($): Restricts usage until the selected items meet a minimal monetary threshold.
- Minimum quantity of items: Requires a minimum number of targeted units to trigger the markdown calculation.
3. Operations & Live Rules Sync (Right Column)
The side column handles immediate status settings, timing constraints, and provides a real-time configuration summary card.
A. Operational Status
- Active: Instantly activates the rules logic on the live storefront if validation constraints are satisfied.
- Inactive: Pauses processing for the selected campaign without losing your configuration settings.
B. Schedule Timeline
- Start Date: Select the initial day when processing begins. Note: If you plan to start your campaign immediately on the current day, no start date input selection is mandatory.
- End Date: Set a firm date to automatically terminate processing and deprecate the discount token.
C. Summary Preview Card
The sticky Summary Preview panel aggregates your selected parameters dynamically, displaying an Active badge status check along with a breakdown of:
- Amount: Displays the target value calculation (e.g., 10% OFF).
- Eligibility: Displays targeted shopper segments.
- Timeline: Outlines active start and end durations.