Customization
Header Customize - Customization Guide
Learn how to configure how your customers access their wishlist directly from the storefront layout. This guide covers how to set up entry shortcuts like a custom navigation item or a sticky floating action button.
1. Active Tab Selection
To configure these visibility shortcuts, ensure that the Header Customize tab is selected at the top of your configuration panel.
2. Configuration Settings (Left Panel)
The left sidebar lets you adjust how, where, and in what style the main wishlist shortcut triggers on your store pages:
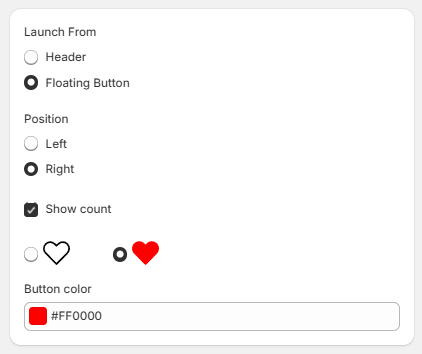
A. Launch From
Choose the primary method for customers to open their wishlist section:
- Header: Integrates a clean shortcut link or icon directly inside your theme's top main navigation menu header.
- Floating Button: Displays a persistent, sticky icon block that remains on the screen as customers scroll through your store pages.
B. Position
Choose which side of the screen your entry button sits on:
- Left: Pins the floating launcher to the bottom left side of the webpage.
- Right: Pins the floating launcher to the bottom right side of the webpage.
C. Count Badge Display
- Show count Checkbox: Toggle this option ON to display a dynamic numbered badge over the icon showing exactly how many items the user currently has saved in their wishlist.
D. Icon Selection & Styling
- Icon Style: Choose between a simple, minimal heart outline layout or a bold, solidly filled red heart shape icon design.
- Border Color: Use the custom color hex code picker to adjust the outer outline accents or border highlights of your launcher.